Turning healthy protein ice cream recipes into fun foods to make at home combines the joy of dessert with the balance of clean eating. This Ninja ice cream recipe transforms simple, wholesome ice cream ingredients into a creamy treat that satisfies sweet cravings without overloading on sugar. Perfect for anyone seeking low sugar desserts that taste indulgent, this recipe fits beautifully into a healthy lifestyle or even a refreshing smoothie drink recipe routine. With just a few nutritious staples and your Ninja machine, you can enjoy a scoopable creation that’s rich, protein-packed, and completely guilt-free.

How My Coconut Berry Protein Ice Cream Started
The Accidental Creation of a Ninja Ice Cream Favorite
It all began on a sweltering summer afternoon when I wanted something cold, creamy, and refreshing but didn’t want to break my healthy eating streak. With my Ninja Creami sitting on the counter, I decided to experiment with leftover coconut milk, a scoop of protein powder, and a handful of mixed berries from the freezer. The result? A surprisingly smooth blend that tasted like a decadent dessert but aligned perfectly with my goals. That spontaneous mix quickly became one of my favorite fun foods to make and a staple Ninja ice cream recipe whenever cravings hit. Sometimes, the best protein ice cream recipes happen completely by accident.
There’s something undeniably satisfying about creating your own protein ice cream recipes from scratch. You control the ice cream ingredients—from the type of milk and sweetener to the exact texture you love. Instead of relying on store-bought pints loaded with sugar, you can tailor your own low sugar desserts to your preferences. Homemade ice cream isn’t just about flavor; it’s about the fun of experimentation and the joy of knowing every ingredient serves a purpose. Plus, when blended just right, it can double as a velvety ice cream smoothie that fits seamlessly into your wellness routine.
The process turned into a little experiment that became a weekly ritual. Soon, every weekend involved trying new puree blends, different kinds of protein powders, and fresh add‑ins that made each batch unique. That’s the beauty of home‑made Ninja ice cream recipes—they make kitchen creativity irresistibly fun.
Print
Coconut Berry Protein Ice Cream
- Total Time: 24 hours 10 minutes
- Yield: 4 servings 1x
Description
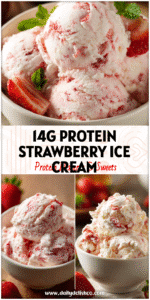
This creamy coconut berry protein ice cream is a low sugar dessert made in a Ninja Creami for a guilt-free treat. It combines coconut milk, protein powder, and mixed berries for a rich, satisfying scoop.
Ingredients
Instructions
1. Whisk together coconut milk, protein powder, sweetener, vanilla extract, and sea salt until smooth
2. Stir in mixed berries to distribute evenly
3. Pour mixture into a freezer-safe container and freeze for at least 24 hours
4. Process frozen mixture in the Ninja Creami using the Ice Cream function
5. If texture is icy, add 1-2 tablespoons coconut milk and re-spin until smooth
6. Scoop and serve immediately or refreeze and re-spin before serving
- Prep Time: 10 minutes
- Cook Time: 0 minutes
- Category: dessert
- Method: ninja creami
- Cuisine: american
Nutrition
- Serving Size: 1/2 cup
- Calories: 165
- Sugar: 3
- Fat: 9
- Carbohydrates: 7
- Protein: 14
Keywords: fun foods to make, ninja ice cream, protein ice cream, low sugar desserts, ice cream maker recipes, coconut ice cream, berry ice cream
The Perfect Blend – Ingredients and Tools
The Healthy Ice Cream Ingredients That Make It Work
The secret to a truly indulgent yet nutritious scoop lies in thoughtfully chosen ice cream ingredients. For this recipe, every component serves a dual purpose—taste and function. Coconut milk forms the creamy base, bringing healthy fats that mimic the richness of traditional ice cream while keeping it dairy-free. A quality vanilla protein powder boosts the nutritional value and adds a naturally sweet flavor that supports protein ice cream recipes perfectly. Mixed berries—fresh or frozen—lend natural color, antioxidants, and light tartness to balance the creaminess.
Use a low-sugar sweetener such as stevia, monk fruit, or erythritol to get that familiar ice cream sweetness without spiking your sugar intake. A splash of vanilla extract deepens the flavor profile, while a pinch of sea salt subtly enhances every ingredient. Together, these choices align beautifully with today’s low sugar desserts trend and show how protein ice cream recipes can be both wholesome and cravable.
- 1 cup full-fat coconut milk
- ½ cup mixed berries (strawberries, blueberries, raspberries)
- 1 scoop vanilla protein powder
- 1–2 tablespoons low sugar or zero-calorie sweetener
- ½ teaspoon pure vanilla extract
- Pinch of sea salt
Optional add-ins for variety include unsweetened shredded coconut, chia seeds for fiber, or a touch of almond butter for richness. These ice cream maker recipes are easy to customize depending on dietary goals and taste preferences.
The Tools You Need for Smooth and Creamy Results
To turn these wholesome ingredients into luscious ice cream, you’ll need the right tools to get that signature creamy Ninja texture. A Ninja ice cream maker or Ninja Creami is the go-to choice for perfectly blended Ninja recipes. Its unique churning and remix functions allow for even freezing and a silky finish that rivals any store-bought pint. If you don’t have one, a regular ice cream maker or high-speed blender with a freezer-safe container can also deliver satisfying results.
| Tool | Purpose | Optional Add-Ins or Alternatives |
|---|---|---|
| Ninja Creami or Ice Cream Maker | Churns and aerates mixture for smooth texture | Use high-speed blender if not available |
| Freezer-safe container | Freezes mixture evenly before processing | Any BPA-free storage container works |
| Measuring cups & spoons | Ensures precision in ice cream ingredients | — |
| Spatula | Scrapes sides to blend thick mixtures | — |
| Mixing bowl | Combines all ingredients evenly | — |
For those who love smoothie drink recipes, the same ingredients can be used straight after blending—skip the freezing step, pour into a glass, and enjoy a chilled ice cream smoothie instead. The joy of ice cream maker recipes lies in how easily they can adapt to your mood—frozen scoop today, creamy sip tomorrow. Using these simple tools and nutrient-rich ice cream ingredients, you’ll have everything needed to create a batch of low sugar desserts that are both satisfying and smart.
The Step-by-Step Method – Turning Ingredients Into Magic
The Easy Preparation Method
Creating this Ninja ice cream recipe is simpler than you might think. Once the ingredients are assembled, all that’s left is a little blending, freezing, and churning magic. Here’s how to bring your protein ice cream recipes to life step by step:
- Combine Ingredients – In a mixing bowl, whisk together the coconut milk, protein powder, low-sugar sweetener, vanilla extract, and sea salt until smooth. Next, toss in your mixed berries and gently stir to distribute them throughout the base.
- Blend Smoothly – If you prefer a completely uniform texture, use a blender to break down the berries before freezing. For a more rustic, fruit-swirled finish, leave some chunks intact.
- Freeze Overnight – Pour the mixture into your Ninja Creami pint or other freezer-safe container. Secure the lid and freeze for at least 24 hours until solid.
- Process in the Ninja – Place the frozen pint into your machine and select the “Ice Cream” or “Lite Ice Cream” function. Let it churn until thick and creamy.
- Adjust Consistency – If the mixture appears crumbly or icy, add 1–2 tablespoons of coconut milk and run the “Re-spin” or “Smooth Mix” setting to achieve that signature silky texture.
- Serve & Enjoy – Scoop into a chilled bowl or cone. Freeze again and re‑spin before serving for future batches.
Pro Texture Tip: For a softer, gelato-style finish, allow your freshly processed ice cream to sit at room temperature for 5–10 minutes before scooping. This balances coconut fat and berry fiber for that creamy mouthfeel found in quality ice cream maker recipes.
Pro Tips and Variations
- Peanut Butter Berry Swirl – Add a tablespoon of natural nut butter before blending for extra richness and protein.
- Chocolate Coconut Dream – Mix in a teaspoon of unsweetened cocoa powder plus shredded coconut for a decadent twist.
- Tropical Twist – Replace berries with pineapple and mango to create a sunny flavor variation.
- Ice Cream Smoothie – Skip freezing, blend all ingredients with extra coconut milk, and pour into a glass for a refreshing ice cream smoothie.
Consistency can be customized to your taste. For denser scoops, reduce the liquid slightly; for lighter ones, churn longer or add a spoonful of Greek yogurt. Each batch can feel brand-new while keeping the nutritional balance of a smart low sugar dessert.
| Nutrient | Amount (per ½ cup) |
|---|---|
| Calories | 165 |
| Protein | 14g |
| Carbohydrates | 7g |
| Fat | 9g |
| Sugar | 3g |
Values may vary depending on chosen ice cream ingredients and protein powder, but overall, each scoop delivers a balanced macro profile suitable for low sugar desserts or post‑workout meals. Every batch of these ice cream maker recipes proves how rewarding it is to turn healthy eating into something irresistibly creamy.
FAQs and Final Thoughts
FAQs About Coconut Berry Protein Ice Cream
Can I make this without a Ninja machine?
Yes! While the Ninja Creami ensures top texture, a high-speed blender and freezer-safe container work too. Blend the ice cream ingredients, pour into a container, and freeze for four hours, stirring occasionally to limit ice crystals.
What type of protein powder works best?
Choose a high-quality vanilla or unflavored whey or plant-based protein powder that blends smoothly without grit. Simpler ingredients help keep this in the realm of low sugar desserts.
How do I keep texture creamy without adding sugar?
Use full‑fat coconut milk for smoothness. Optional xanthan gum and thorough churning keep the base velvety. Sweeteners like erythritol or allulose provide sugar-like mouthfeel with fewer calories.
Can I use frozen berries instead of fresh?
Absolutely. Frozen berries are ideal and chill the base faster. Just blend them evenly to maintain that fruity swirl throughout your homemade protein ice cream recipes.
Why This Recipe Belongs in Your Kitchen
Coconut Berry Protein Ice Cream captures exactly why fun foods to make deserve a spot in your routine—simple preparation, no refined sugar, and flavors that never get old. This Ninja ice cream recipe is more than dessert; it’s a satisfying, protein-rich way to nourish your body and delight your taste buds.
Using wholesome ice cream ingredients like coconut milk, berries, and protein powder offers classic ice cream pleasure without guilt. Whether made in a Ninja Creami or any home ice cream maker, it’s fast, customizable, and endlessly rewarding.
As a modern favorite among low sugar desserts, it blends naturally into meal prep, recovery snacks, or family dessert nights. This creamy, refreshing creation shows that healthy eating can still feel indulgent and joyful every single scoop.